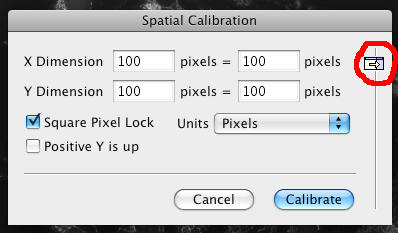
Click on Image in the main menu and select 'Calibration...' to open the Spatial Calibration dialogue box. Click the unobtrusive little arrow icon on the right of the box (ringed in red in the adjacent image) to expand a list of saved calibrations. These have been measured by Light Microscopy Facility staff members so they may only include the most popular lens and camera binning combinations. If you want to use a different magnification factor (e.g. 4x binning, 2.5x optovar lens, etc.) then please email a request to the light microscopy facility. Select a saved calibration and click Calibrate. All images in the document will now be calibrated. IMPORTANT: All the images in the document will have the same calibration so if you have changed magnification or binning while capturing to the same document at least some of your calibrations will be wrong. The best thing to do is to make sure all images in a document are captured at the same magnification and to open a new document if you want to change magnification. |