Hardware
- Turn the green on the power switch on the EL6000 epi-fluorescent light source. This is not required for confocal imaging or STED but you need it to see fluorescence down the microscope eyepieces.

Turn on the red switches (PC Microscope
–, Scanner Power
–and Laser Power) on the right side of the desk
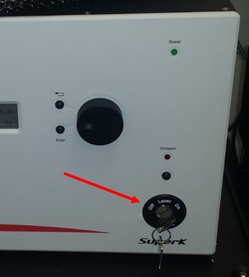
from left to right onand turn the Laser Emission key
into the
on position to switch on the microscope.

On position.

Info If you only need to transfer data from the computer and you don't need to use the confocal or STED you can just turn on the PC Microscope button, which supplies power solely to the computer and microscope stand.
- Make sure that the white light laser (WLL) key is in ON position (always leave on).

- To turn on the STED laser press the button and wait until the orange LED (A) turns green (B, SHG ready). This should not take longer than approx. 10 min. When the LED turns green turn the key in the ON position.

- Turn on the FL6000 epi-fluorescence light source.

Login to the PC using the TCS-User account. No password is required.
Software
- Double click on the LAS X desktop icon to start the Leica acquisition software.

- A Configuration pop-up window opens. Select Configuration - machine.xlhw, Microscope – DMI6000 and Resonant – OFF (unless you want to use the resonant scanner for fast imaging).
- For the confocal only mode select STED – OFF
- For the STED mode select STED – ON
Press OK.

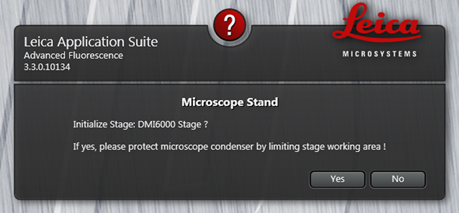
- In When the Microscope Stand pop-up window appears make sure that the condenser is high enoughall the way up, so that it does not interfere with the moving stage, then select YES (If it is too low down, please move it up before selecting YES).
- After some time the start screen of the software will appear and you are ready to start setting up your experiment.
