M03c - Embed media with multiple files & a PDF
Keywords: media, website, HTML, images, upload, file, content
What is it?
There are a few options for embedding multiple file media (like a website) into your Moodle course. In both cases, you need to zip your files together into one file on your computer before you begin. If you don't know how to do this refer to M03b - Uploading multiple files using zip
Why use it?
Media is embedded, a media player appears directly on the page allowing people to view or listen without leaving the page.
Who can use it?
- Tutors and course administrators can add and edit the media files.
- Students can view the media files.
Before I start...
None at this time.
How do I set one up?
Add a file to your course page and set the main file
If you want students to click on a link on the Moodle course homepage and view the website from there you can add the zipped files as a file and set the main file to index.html (or whatever the main file is called*)
* For Articulate Storyline the main file is called story.html
- Navigate to your Moodle course and use the toggle switch to turn 'Edit mode' on.
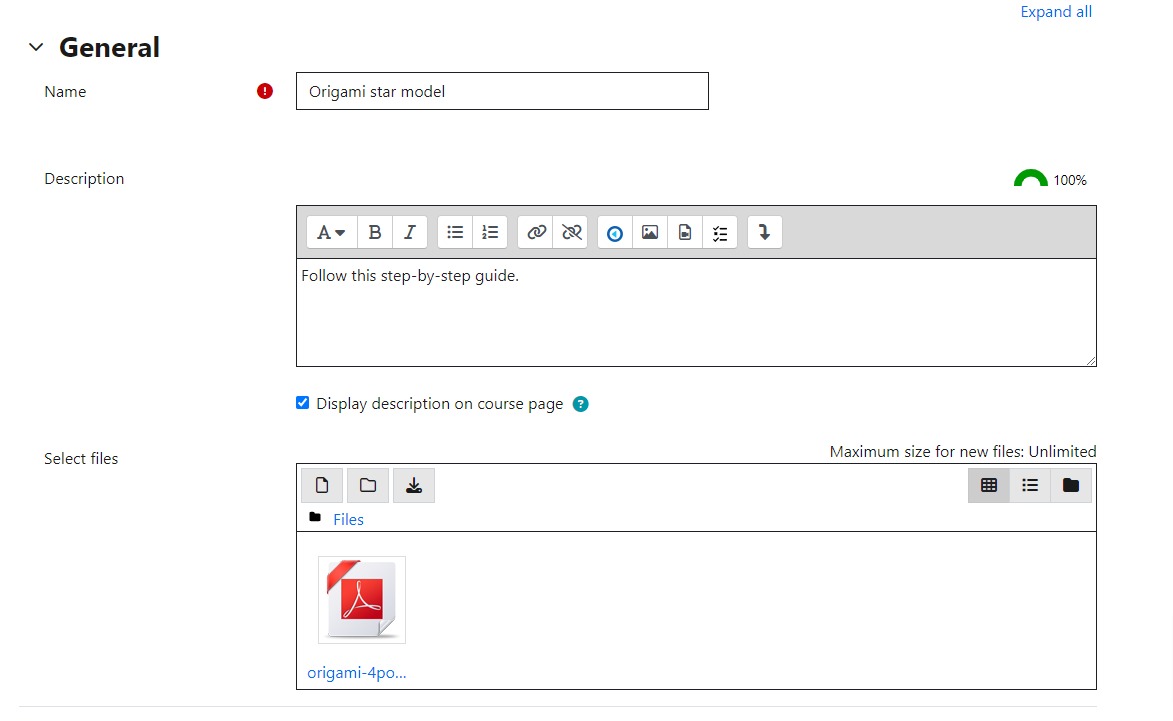
- Go to the section of the course where you want to add files, select the '+' icon which will open the Add an Activity or Resource and then from the list select 'File'.
- Add a Name (the text the user will click on).
- Add a Description- you can choose to show the Description below the link (Display description on course page).
- In the contents area you can drag and drop your zip file onto the blue arrow or you can click 'Add' to go to the file picker.
- The Moodle File picker appears, offering some possible sources.
- Upload a file at the top is the most common option.
.jpg?version=1&modificationDate=1690409826000&cacheVersion=1&api=v2&width=364&height=250)
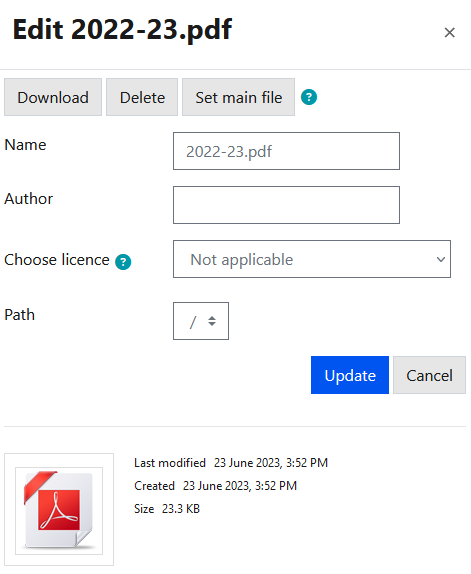
- Select Choose File, and the Windows (or Mac) file manager appears. Find and click on the file you want.
- You can add details for the Author (usually you) and Licence (this is a check to ensure you know the copyrights of any materials you upload, choose what you think is appropriate).
- Click 'Upload this file'.
- Once the zip file is uploaded it will appear in the Select Files area with the following icon:
.jpg?version=1&modificationDate=1690409929000&cacheVersion=1&api=v2&width=105&height=107)
- Left-click on the zip file and click ' Unzip' .
.jpg?version=1&modificationDate=1690409976000&cacheVersion=1&api=v2&width=205&height=250)
- You will be returned to the Adding a new File window and you will see the unzipped files from the zip file in the Select Files area.
- Left click on the main file (usually index.html) and click 'Set main file'.
- The file you selected will display its name in bold.
Scroll to the bottom of the page and click 'Save and display'.
Embed a PDF
Before you progress with the below steps please consider Embedding PDFs could cause Data Protection and GDPR issues.
- Navigate to your Moodle course and use the toggle switch to turn 'Edit mode' on.
- Upload the PDF to a hidden section - See Moodle course structure for further information.
- Open and Edit the uploaded PDF, click on 'Common Module Settings' to Edit the PDF's Availability and select 'Make Available but don't show on course page' which will make your PDF 'Available but not shown on course page'.
- Copy the page link of the uploaded PDF.
- Go to Add an Activity or Resource and then from the list select the Text and Media area.
- Paste the HTML Code that follows into the page content section <embed src=" LINK" quality="low" height="540" width="720" />.
- Copy the page link of the uploaded PDF to the orphaned section (please make sure it's viewable for students).
- Paste the link replacing the bit of HTML code highlighted in red which is the HTML address of the PDF you have uploaded.
- Save and exit.
Further help
If you find any inaccurate or missing information you can even update this yourself (it's a communal wiki).
If you have a specific question about the tool please contact the Digital Education team.
Caution
Please consider that Embedding could cause copyright & GDPR Issues. Please see the attached document for information on copyright and GDPR.
Examples and case studies
None at this time.
Questions & Answers
None at this time.
Further information
None at this time.
This information is provided by Digital Education
( https://www.ucl.ac.uk/isd/digital-education-team-information ) and licensed under a Creative Commons Attribution-ShareAlike 4.0 International License
