...
- Switch PC on computer and select User account on start-up (no password required).
- log on via pGina with agendo user name & password
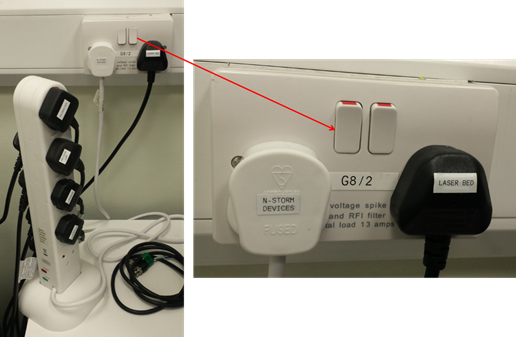
- Switch on wall switch labelled N-STORM DEVICES. This switches on the extension lead which the microscope, controller, SpectraX LED, motorized stage, etc.) are plugged in to an extension lead and can be turned on by switching on the wall socket labelled N-STORM DEVICES behind it. The switch
- & motorised stage are connected to. Switch on the wall switched to the right labelled LASER BED turns on the
- , and to the left labeled LASER CONTROLLER for main power for
- to the Agilent
- laser bed & controller.
- The Agilent laser bed has a main power switch at the back, which should always stay on. Then turn the

- Turn the laser key at the front of laser bed in ON position and turn the required lasers to ON. Some of the buttons will blink as the laser warms up, but this will stop after a couple of minutes. Check that the lasers you want are on and lighted up. If they are not lighted up, turn the on by pressing the 4 buttons at the front of the laser from left to right. The buttons will light up red when the lasers are ready.

 button with the wavelength number on it.
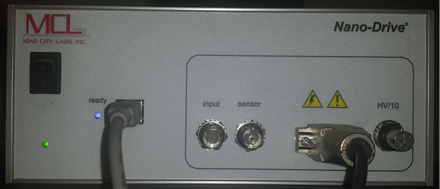
- The MCL nanodrive piezo stage controller is not required for STORM imaging and only needs to be switched on if you would like to use it to acquire Z-stacks in the ND-Acquisition mode or to acquire 3D STORM calibration files.
- The remaining equipment on top of the incubation chamber controls the Solent Scientific sample incubation equipment and lights in the chamber and only needs to be turned on if required for the experiment.
- Open the Nikon software by double-clicking on the NIS-Elements icon on the desktop.
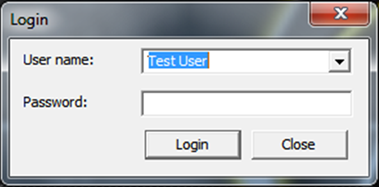
- When prompted select a user account (e.g. here Test User, no password) and click Login (every user will get their own user account based on their requirements following training on the microscope).
- Another pop-up window (Driver selection) will open in which you need to select which camera you want to use for your imaging. For STORM imaging select Andor with N-STORM which will use the Andor iXon EMCCD camera. For widefield and time-lapse imaging it is recommended to use the Andor Zyla sCMOS camera instead. Most users will only have access to one of the cameras with their user account depending what application they have been trained in, but in some cases you may also be given the option to enable multiple cameras.
...
- It is simplest to enable multi-camera and initialise both cameras.

- The NIS-Elements software opens and you are ready to set up your experiment. The Nikon N-STORM microscope is capable of doing STORM, as well as multiparameter widefield imaging with EPI or TIRF illumnation. The setup of either type of experiment will be described in the sections GETTING STARTED - Multiparameter widefield and TIRF imaging and GETTING STARTED - STORM imaging and analysis. The next section will cover how to put a specimen on the microscope stage and focusing on it.