Adding/Removing Class Content
This training guide describes the basic steps required to add content to a class and make it available for students to view.
It involves:
- Add Content to a Class
- Add a Video to a Class
- Add a Presentation to a Class
- Edit Content Detail
- Remove Presenter from a Recording
1. Add Content to a Class

The screenshot above shows that the 'Plus' icon sits in different locations. This indicates the kind of media that can be added to that class from the list. You can click on the 'Plus' icon to add content.
Each class can contain one video and one presentation. The icons (regardless of colour) indicate what content already exists for the class. If you want to add a new class to your course, select "New Class" in the top right-hand corner.
- A Class is a container in Lecturecast (Echo 360) designed to contain various forms of media that students can access and engage with.
2. Add a Video to a Class

In cases where the class includes a presentation but lacks a video (and does not have a grey placeholder for a scheduled recording), you can add video media to the class by clicking on the 'Plus' icon in the video slot. This allows you to choose from your content library or upload a file from your local computer or shared drive.
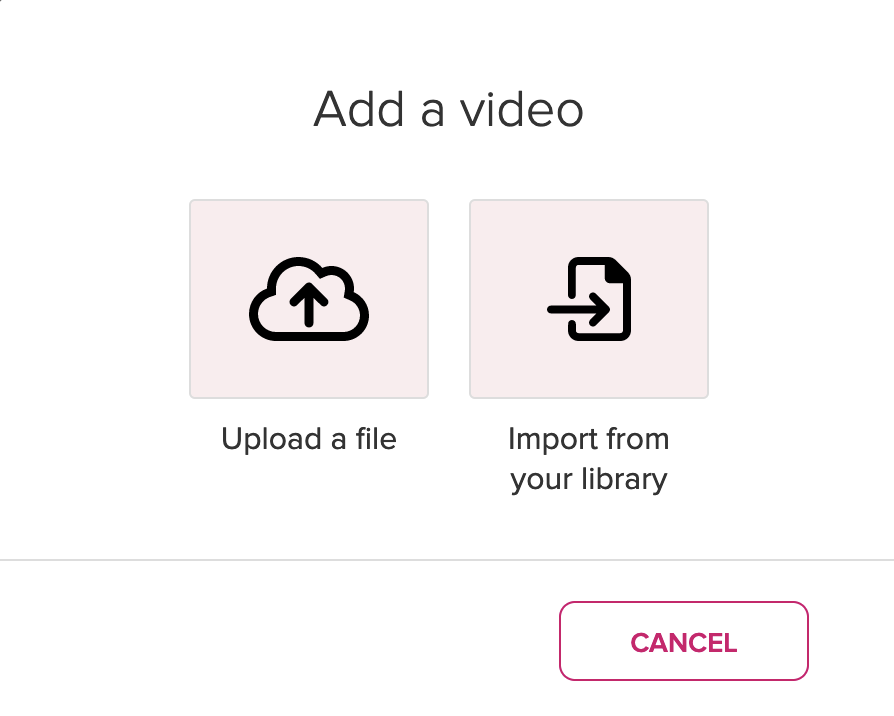
Select 'Upload a file' or 'Import from your library' to complete this action. If you select 'Upload a file' a window appears allowing you to navigate to your content, select and upload it. If you select 'Import from your library', your library content list appears allowing you to select the item to publish to the class.
Note
Your uploaded video will need to finish processing before it can be viewed. You may need to refresh your screen to
confirm the video has finished processing.
- You can remove or replace an existing video, but all associated data, analytics, notes, etc., are deleted from the system.
- You cannot add a video to a class that has been automatically generated by the Lecturecast scheduling system.
3. Add a Presentation to a Class

If the class contains a video (or a grey video placeholder) but lacks a presentation, you can click on the 'Plus' icon in the presentation slot to add a presentation to the class. This is demonstrated in the example below. You have the option to upload a presentation file, choose one from your Library, or create a completely new presentation in Lecturecast (Echo360).

Select 'Upload a file' or 'Import from your library' to complete this action. If you select 'Upload a file' a window appears allowing you to navigate to your content, select and upload it.
If you select 'Import from your library', your library content list appears allowing you to select the item to publish to the class.
4. Edit Content Detail

Click on the 'Media Content' icon then select the 'Edit details' option from the drop-down list.
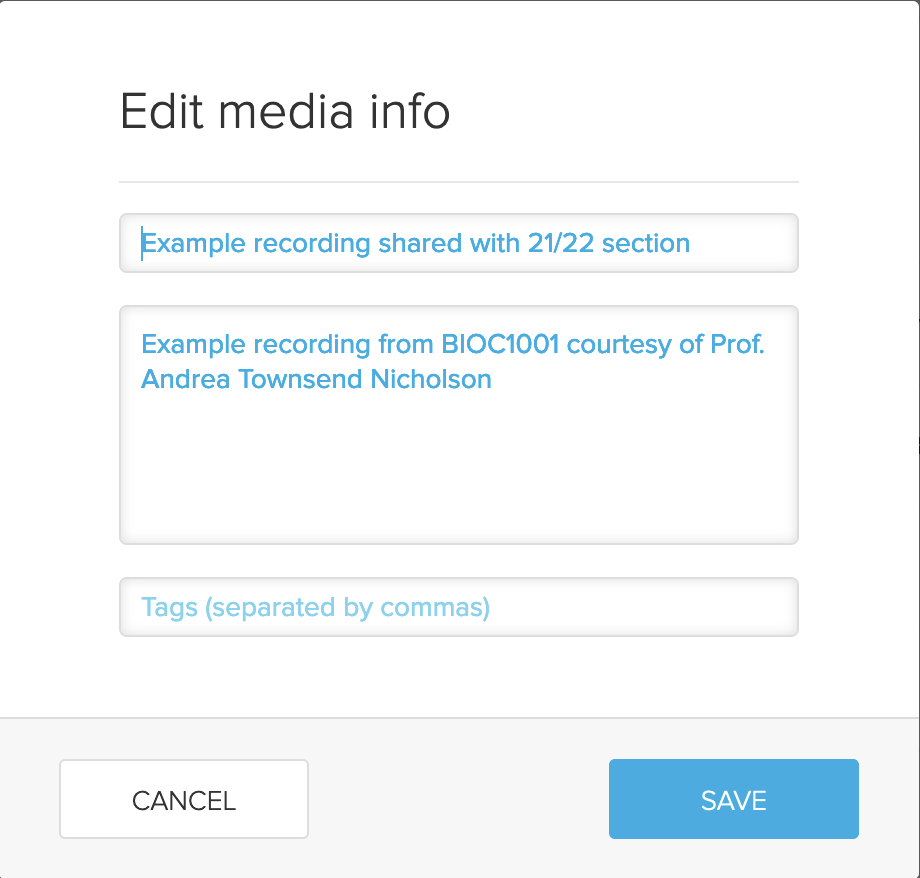
Add a description and tags so you can easily find the content later, and save your changes.
Make content Available / Unavailable for students to view:
- Once content has been added to a class, you can edit it and make it available, please refer to the Edit and make a capture available training guide.
- To view Lecturecast content, refer to the View class content training guide.
5. Remove Presenter from a Recording

Click the 'Media' icon then from the drop-down menu select "Edit Video".
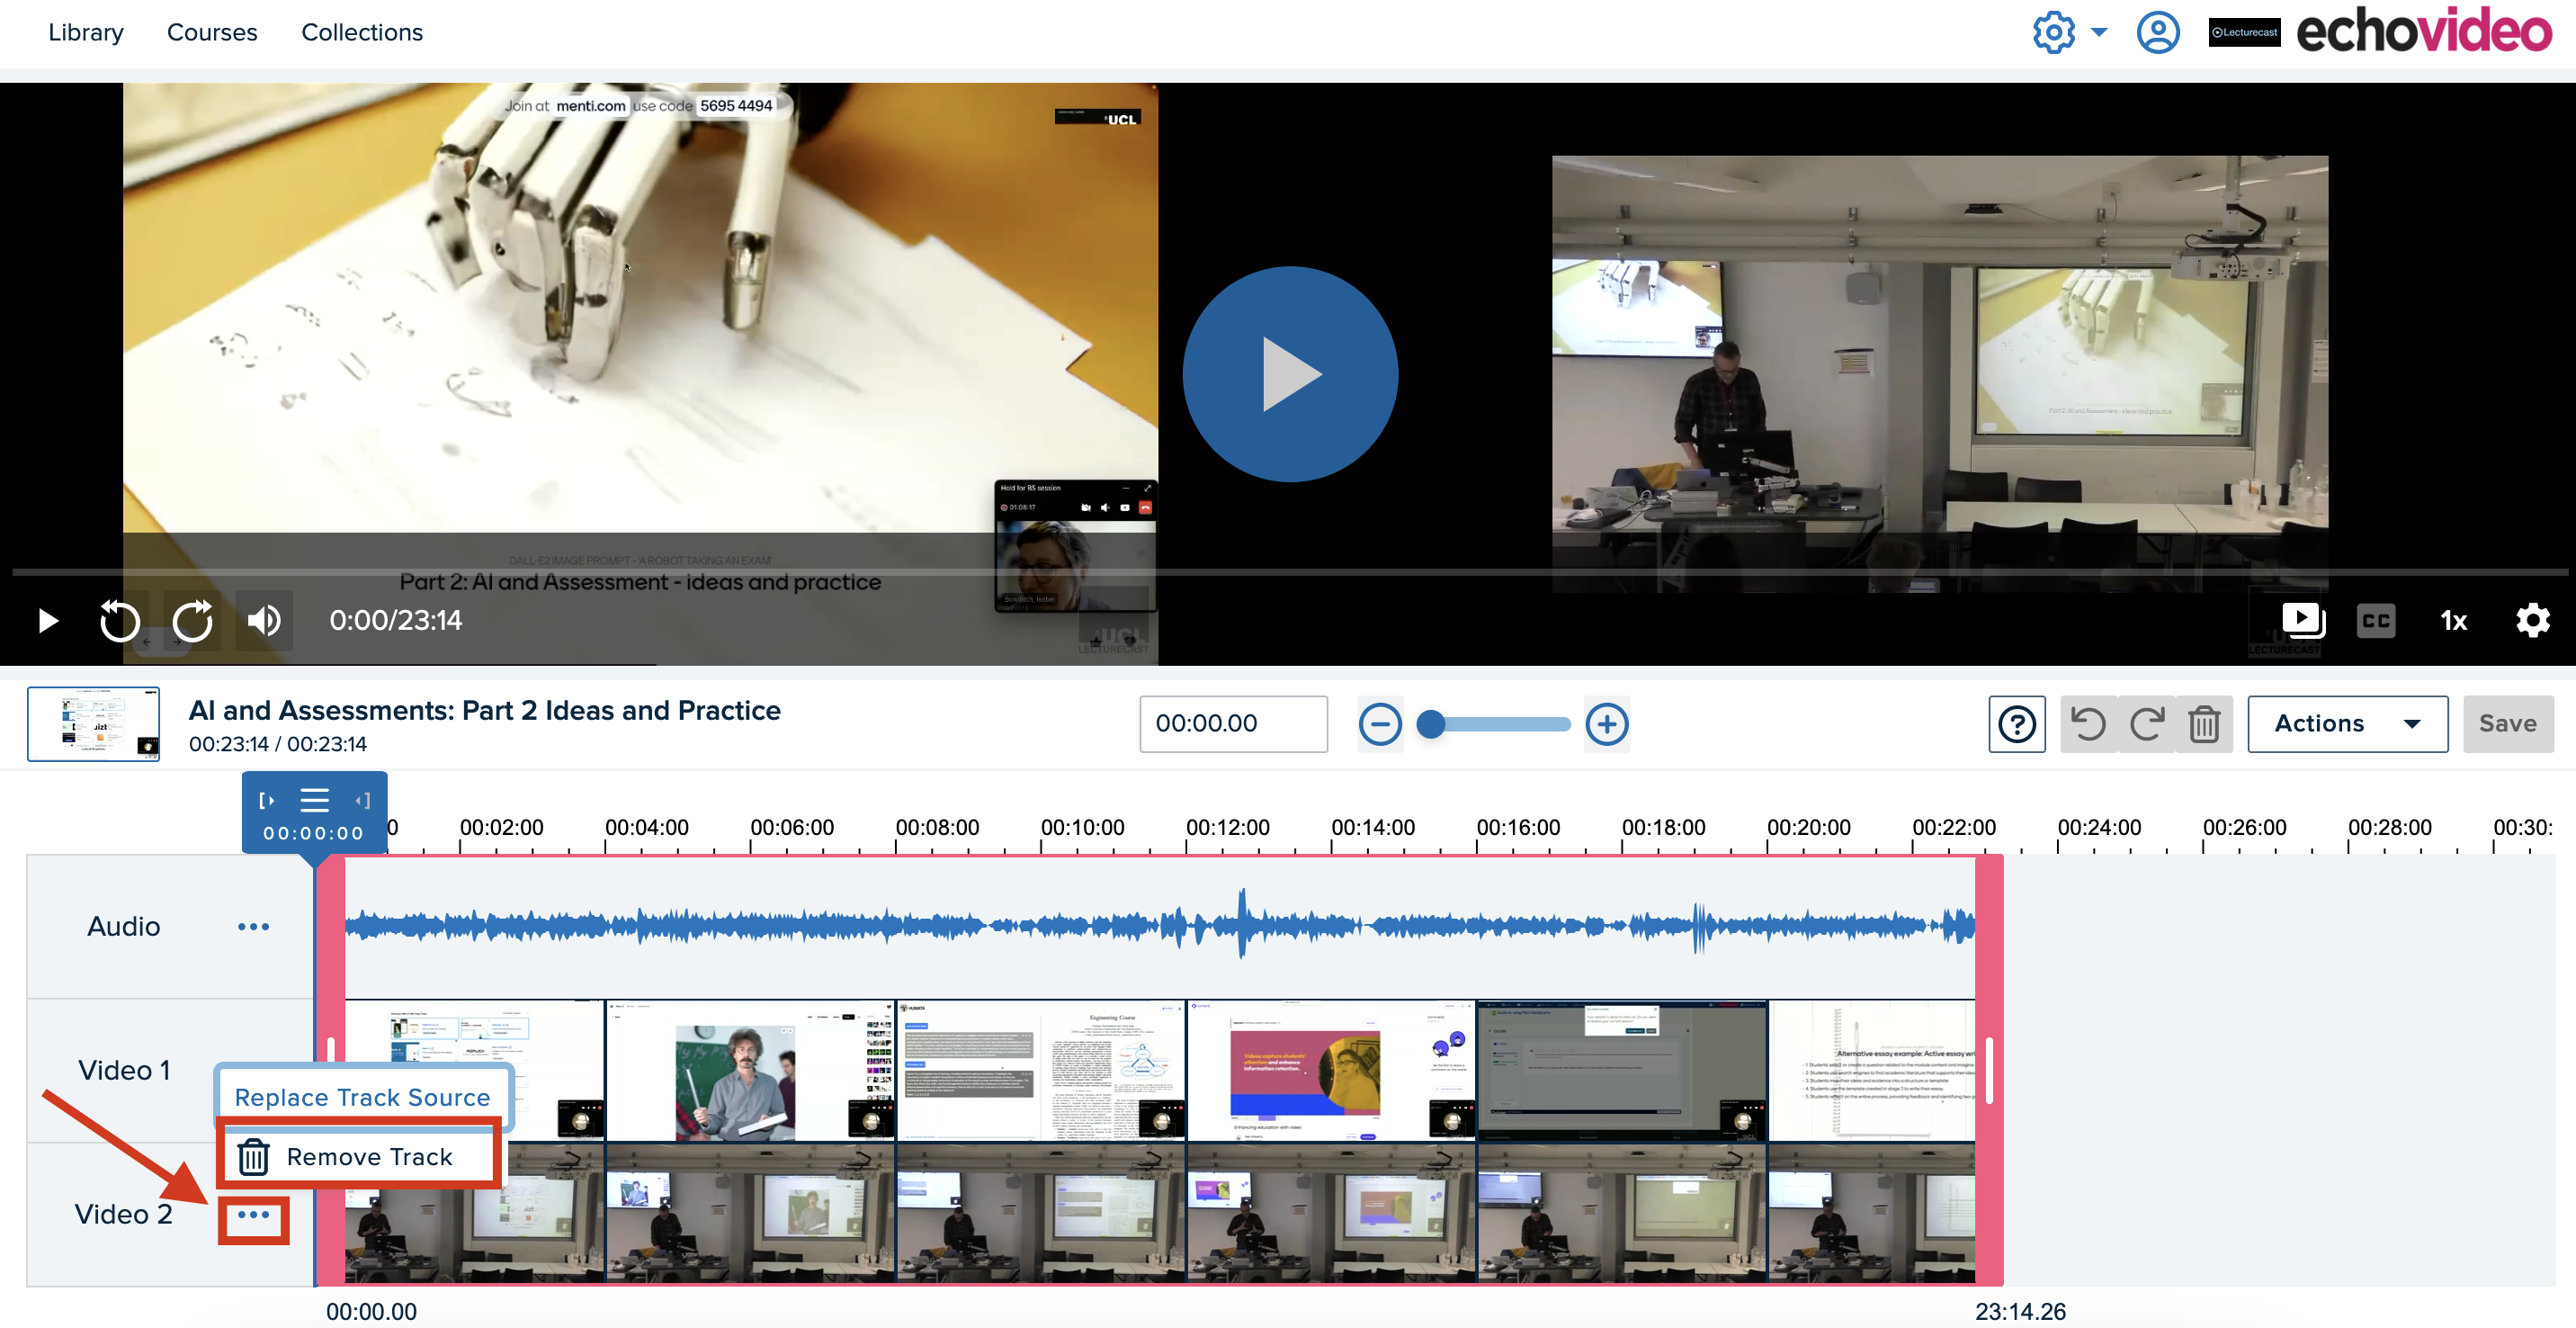
Click the three dots (...) then select 'Remove Track'. Please take note that once you save the change, the presenter capture track cannot be restored. It is highly recommended that you create a copy of the original capture in your Lecturecast Media Library as a backup, in case any unintended changes are saved.
- When using Lecturecast Scheduler to schedule a capture, you have the option to choose whether or not to include the presenter in the recording.